Create a workspace
Bu içerik henüz dilinizde mevcut değil.
A workspace is how you bring teammates into Entergram and share the CRM layer across the team. Any signed-in user can create one — there’s no plan or role prerequisite. You’ll end up as the Owner of a new workspace, ready to buy seats and invite people.
-
Open the create flow — Settings → “Create workspace”, or use the workspace switcher in the sidebar. Give the workspace a name and confirm.
-
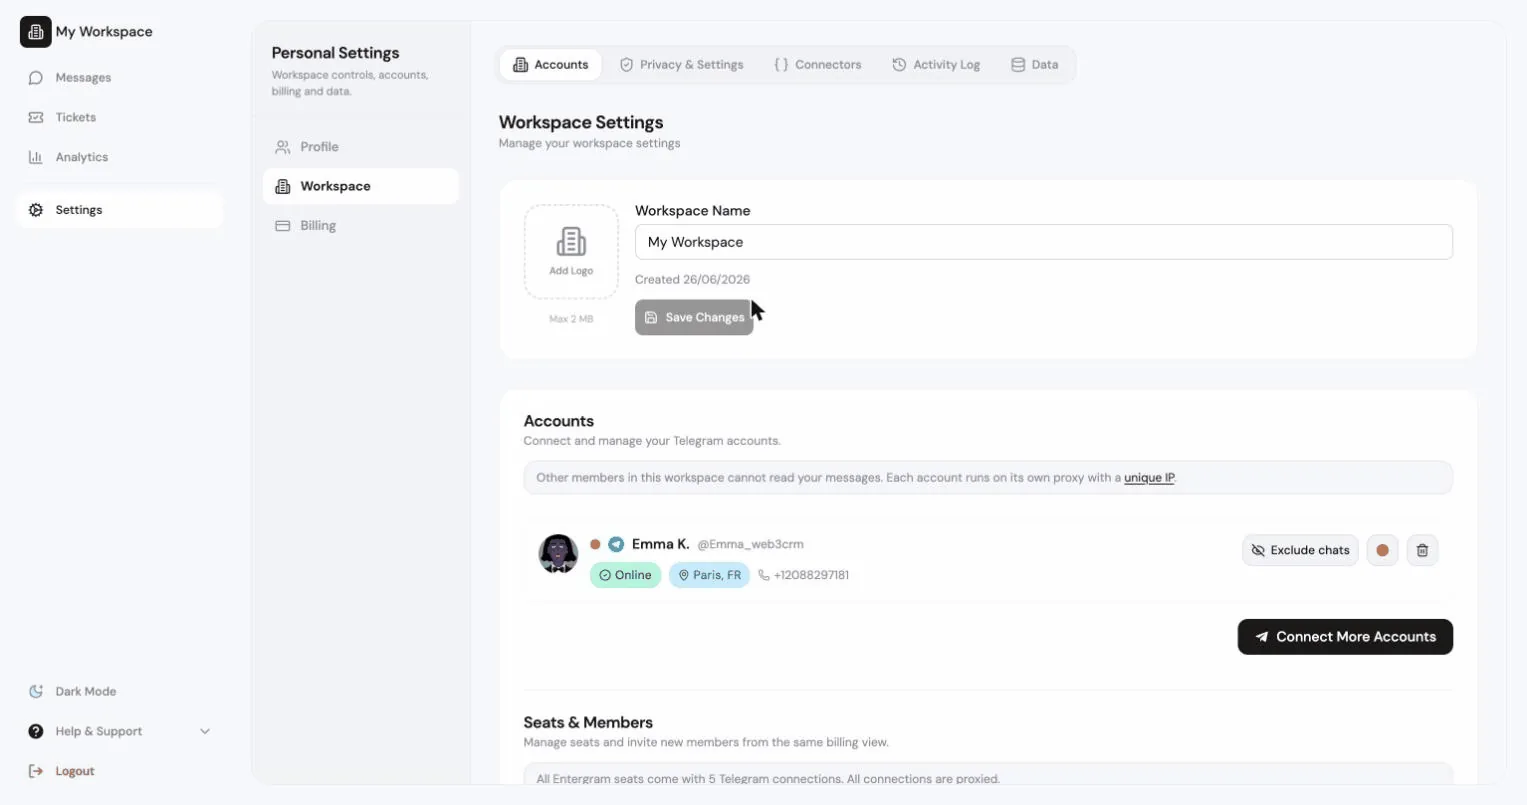
You’re the Owner. Set the workspace identity — edit the name inline and upload a logo (it shows in the sidebar switcher and on invite pages). The read-only Workspace ID lives here too.
Details & edge cases
Section titled “Details & edge cases”- Owner by default — whoever creates the workspace is its Owner. You can promote members to Admin later (see Permissions & roles).
- Workspace identity is editable any time: name (inline edit), logo (upload), Workspace ID (read-only).
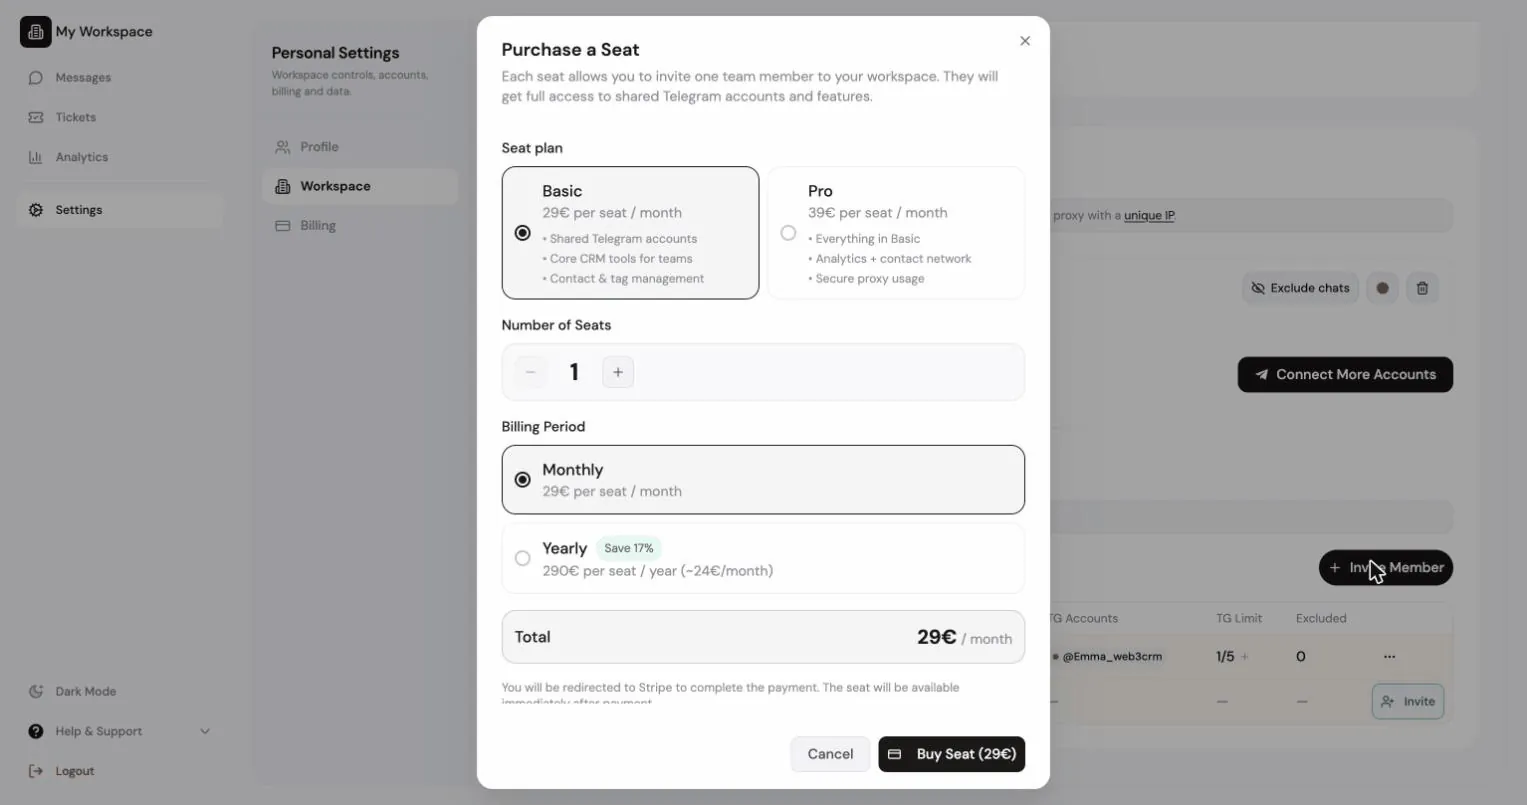
- Solo → team — if you were on a solo Pro subscription, you can move billing to the workspace; see Plans, trial & billing and the seat-buying flow.
Moving from solo Pro to a 3-person team
Section titled “Moving from solo Pro to a 3-person team”- Settings → Plans → confirm you’re on Pro active.
- Sidebar → Create workspace.
- In the Stripe portal, review your solo subscription (cancel at period end once the workspace is paying for you).
- Workspace tab → Seats → buy 2 Pro seats (or 3 if you want your own seat too).
- Invite teammates to the purchased seats.